





To get photos to appear and convert on your Google Business Profile, first verify your profile, then upload real JPG or PNG images that match Google’s size recommendations and the main photo categories: exterior, interior, product, and team. Check each upload’s status afterward, and swap out anything Google marks as rejected before it hurts your listing’s first impression.
TL;DR:
- Upload at least nine images covering exterior, interior, and products or staff, following Google’s size, format, and content policies to ensure visibility.
- Prioritize high-quality, authentic photos with natural lighting that accurately represent your space, updating them regularly to improve profile engagement.
- Verify your profile and maintain a consistent upload pace to signal activity, which positively influences your local search ranking.
- Use wide format images for cover photos and clean, simple logos at 720×720 pixels to optimize first impressions and branding.
- Manage privacy by obtaining consent for recognizable faces and avoiding revealing sensitive location details before uploading images.
Table of Contents
- Google Business Profile Photo Guidelines You Need to Follow
- Which Photo Categories Should You Upload First?
- How Do You Add or Remove Photos on Google Business Profile?
- What Makes a Google Business Photo Actually Perform Better?
- How Do You Fix Rejected or Poorly Displayed Photos?
- Are 360° Virtual Tours Worth It for Your Business?
- Quick Wins Every Owner Can Do in an Hour
- What Are the Privacy Rules for Photos You Upload?
- What Google Business Photos Actually Get Right (and Where Owners Waste Effort)
- Want a Local Marketing Team to Handle Your Photos for You?
- Sources
- FAQ
Google Business Profile Photo Guidelines You Need to Follow
Google keeps its photo rules narrow on purpose, and skipping them is the fastest way to get an upload rejected. Files must be JPG or PNG, between 10 KB and 5 MB, with a minimum resolution of 720 by 720 pixels on the shortest side. Cover photos work best at a wider ratio, closer to 1024×576, while square 720×720 images suit general business shots and product close-ups, according to Google’s photo sizing guidance.
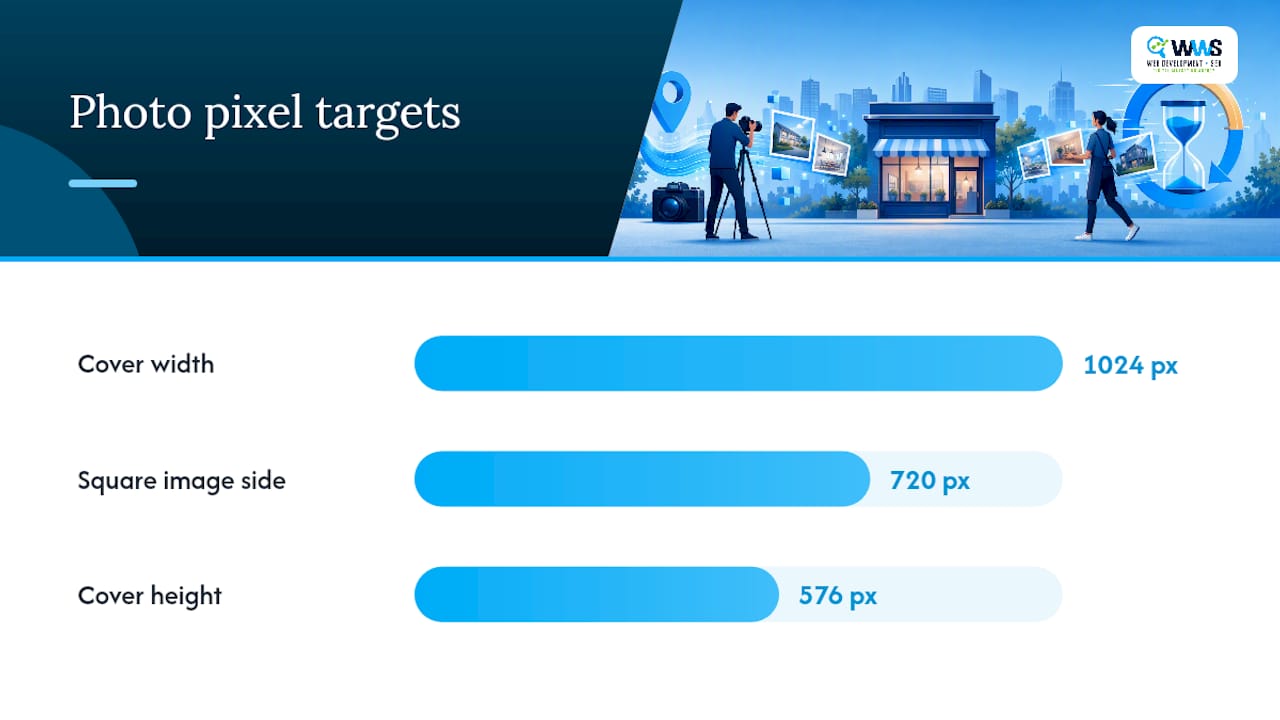
Content policy matters just as much as technical specs. Google requires photos to represent reality — no heavy filters, no AI-generated composites, no stock photography standing in for your actual storefront. A photo that looks staged or altered tends to get flagged, and repeated violations can affect your account standing.
Here’s what determines whether your photos even show up:
- Verification status. Unverified profiles can’t display owner-uploaded photos publicly, even after a successful upload.
- Media processing status. Every upload cycles through Pending, then either Not approved or Live, a workflow Google documents in its photo management help.
- File integrity. Corrupted files, watermarks, and text overlays are common rejection triggers.
Pro Tip: Most rejections trace back to one issue: the photo doesn’t match what a customer would see walking through your door. When in doubt, ask “would this surprise a first-time visitor?”
Which Photo Categories Should You Upload First?
Google recommends a baseline of at least three photos each for exterior, interior, and product or team categories to boost profile engagement, according to Google’s own tips for business photos. That’s nine images minimum before your profile is doing real work for you.
Prioritize your uploads this way:
- Exterior (3+): Storefront from the street, signage at daytime and dusk, and the entrance customers actually used to find you.
- Interior (3+): Wide shots of the main space, a customer-facing area like a waiting room or dining floor, and any distinctive design element.
- Product or team (3+): Signature products, staff at work (not posed lineups), and any equipment or process that sets you apart.
Your cover photo and logo deserve separate attention. The cover photo is the first image customers see in search results, so it should use that wider 1024×576 ratio and show your best exterior or interior shot. Your logo displays as a small square icon next to your business name, so a clean, high-contrast design at 720×720 reads better than a busy photo crammed into that space.
How Do You Add or Remove Photos on Google Business Profile?
Uploading is straightforward once you know where to click, whether you’re on a desktop or standing in your own store with a phone.
- On the web: Log into business.google.com, select your profile, click “Photos,” then choose the category (exterior, interior, product, team) before uploading. Set your cover photo or logo from the same panel using the three-dot menu on any image.
- On Google Maps (Android or iOS): Search your business, tap your profile, scroll to the photo section, and tap the camera icon to add images directly from your phone’s gallery.
- To remove a photo: Open the same photo panel, tap the image, then select the delete option. Owner-uploaded photos can be removed instantly; customer-submitted photos require a policy-violation report if you want them taken down.
- Owner vs. customer control: Photos posted under the “By owner” tab are fully yours to manage. Customer photos live in a separate tab, and you have limited authority over them beyond flagging inappropriate content.
Populating the “By owner” tab with your strongest images gives you more control over first impressions, since Google’s guidance notes that owner-curated photos reduce reliance on whatever customers happen to upload.
What Makes a Google Business Photo Actually Perform Better?
Technical compliance gets your photo live. Composition and timing get it clicked. Center your subject, shoot in natural or soft light rather than harsh overhead fluorescents, and skip filters that push colors away from how the space actually looks in person.
File prep matters more than most owners assume:
- Save JPGs at 80 to 90 percent quality, a range that keeps images sharp while staying comfortably under Google’s 5 MB size limit.
- Use PNG for your logo if it needs a transparent background.
- Name files descriptively before uploading (think “downtown-bakery-storefront.jpg,” not “IMG4021.jpg”) and add a short caption naming what’s in the shot.
- Refresh your photo set three to five times a month, and always update it after a remodel, menu change, or seasonal shift.
Authentic, unedited imagery consistently earns more trust than polished-but-fake alternatives, a pattern that shows up across research on branding authenticity as well as Google’s own content standards.
Pro Tip: Run a simple test: swap your cover photo for two weeks, track profile views in your Business Profile dashboard, then swap back. The comparison tells you more than any generic “best practices” list.
How Do You Fix Rejected or Poorly Displayed Photos?
Most photo problems fall into a handful of predictable buckets, and each has a direct fix.
- Rejected for policy violation: Remove filters, text overlays, or watermarks, then re-upload a version closer to the original, unedited shot.
- Cropped or off-center on display: Upload a wider version of the same image so Google’s automatic cropping has more room to work with, and preview the result on both mobile and desktop before finalizing.
- Cover photo not displaying correctly: Confirm it meets the 1024×576 ratio; a square image forced into a wide frame often crops out the subject.
- Stuck in “Pending” too long: Processing usually resolves within a few hours to a couple of days. If a photo sits pending well beyond that, delete and re-upload rather than waiting indefinitely.
Are 360° Virtual Tours Worth It for Your Business?
Business Photos, Google’s 360-degree virtual tour format, let customers walk through your space before they ever visit, a feature Google Maps documents in detail. Restaurants, retail shops, gyms, and salons tend to see the strongest return, since customers researching those categories often want a sense of layout and atmosphere before committing.
To get one made:
- Search Google’s directory for a Trusted Photographer or Trusted Agency near you and request a quote.
- If none serve your area, you can publish your own 360 content or work with an agency instead.
- Once live, embed the tour on your own website in addition to your Business Profile for double the exposure.
Quick Wins Every Owner Can Do in an Hour
You don’t need a marketing budget to make real progress this week.
- Verify your profile if you haven’t already; unverified profiles can’t show owner photos at all.
- Upload your core set: three exterior, three interior, three product or team shots, all following the size and policy rules above.
- Set your cover photo and logo using the correct ratios so first impressions look intentional, not accidental.
- Run two quick tests: swap your cover image for two weeks and compare profile views, then try a product shot with better lighting and watch for a change in call or direction-request volume.
What Are the Privacy Rules for Photos You Upload?
Uploading a photo that includes a recognizable person carries real legal weight, not just a courtesy consideration. If a customer, employee, or bystander is clearly identifiable in a shot you’re posting publicly, get their consent before it goes live, especially for interior and team photos where faces are the point of the image.
Employees are the easiest category to manage since you control the shoot. Tell staff in advance when you’re photographing for your Business Profile, and let anyone who prefers not to appear opt out. For customer-facing shots, angle compositions so faces are incidental or blurred unless you’ve secured a signed release, which matters more for businesses like gyms, medical offices, or salons where clients have a heightened expectation of privacy.
Minors raise the stakes further. Never post a recognizable photo of a child without explicit parental consent, regardless of how innocuous the setting looks.
Location and security details deserve a second look too. Avoid photos that inadvertently reveal security camera angles, safe locations, employee schedules posted on a wall, or customer personal information visible on a screen or document in the background. A quick scan of the full frame, not just the intended subject, before you upload catches most of these issues.
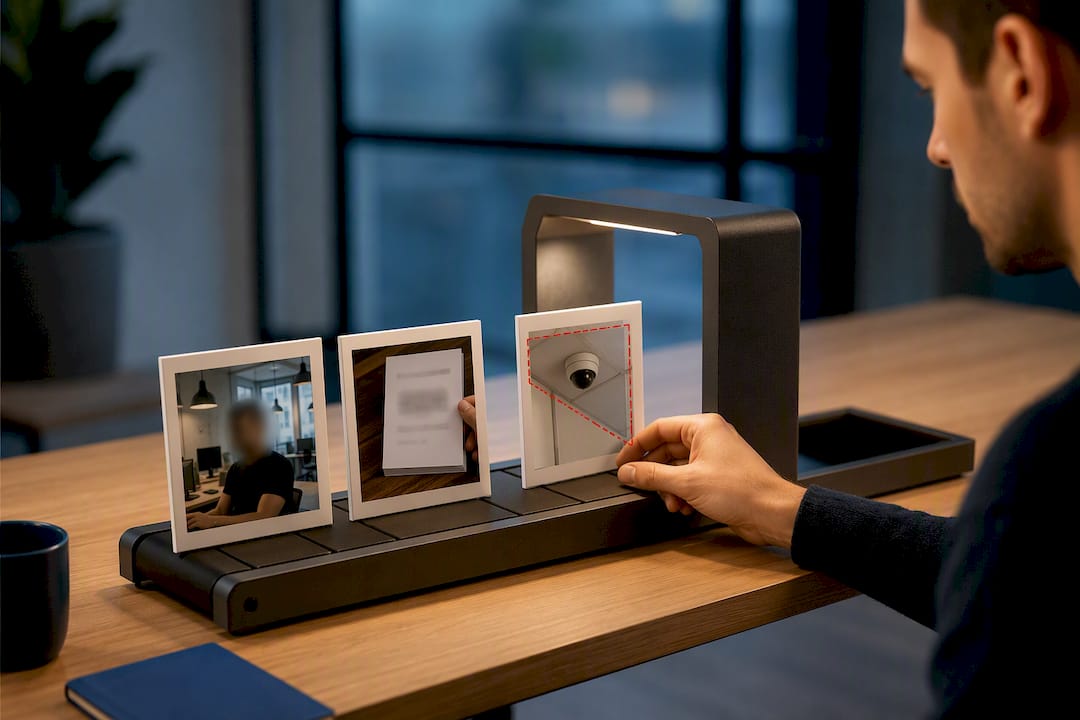
None of this is meant to make you photo-shy. It just means treating your camera roll with the same judgment you’d apply to anything else published under your business name.
What Google Business Photos Actually Get Right (and Where Owners Waste Effort)
The conventional advice on this topic treats photos as a checklist item: upload a handful of images, check the box, move on. That undersells what’s actually happening. A Business Profile with a thin, stale photo set reads to both customers and Google’s own ranking signals as a business that isn’t paying attention to its own listing.
What gets overrated is polish. Owners spend hours color-correcting a single hero shot when nine honest, well-lit photos across the right categories would do more work. What gets underrated is frequency. A profile that adds new images every month signals activity in a way a single perfect photo from three years ago never will, and that pattern shows up consistently in how Google frames business visibility.
If you’re prioritizing, start with verification and the baseline category counts before touching optimization details like file compression or captions. Get the fundamentals live first. Once your core photo set is up and approved, the local SEO fundamentals that surround your Google Business Profile start compounding: photos alone don’t rank you, but a profile with no real imagery rarely competes in the local map pack against competitors who bothered to show up visually.
— Online Marketing Experts
Want a Local Marketing Team to Handle Your Photos for You?
Not every owner has an hour to spare between shifts, deliveries, and the dozen other things a small business demands. WWS – Web Development + SEO is the alternative to piecing this together yourself: our in-house, Google-certified team audits your current Business Profile, tells you exactly which categories are thin, and handles the shooting guidance, uploads, and ongoing testing so your listing stays active without eating your week.
We serve Des Plaines and the greater Chicago Area, and our team consists exclusively of Google and Facebook certified experts who treat your profile the way we’d treat our own. Restaurants, contractors, gyms, and medical offices tend to see the fastest visibility gains once real photography and consistent cadence replace a stale, half-finished listing. If you’d rather have someone else run the checklist, schedule a Google Business Profile optimization review and get a clear plan for what to fix first.
Sources
- Business Profile photos & videos policy and posts content policy – Google Business Profile Help
- Business Photos – Google Maps
FAQ
How Do I Set a Cover Photo on My Google Business Profile?
Open your profile on business.google.com or in Google Maps, go to the Photos section, select the image you want, and choose “Set as cover photo” from the options menu.
What’s the Downside of Relying on Google Photos for Your Listing?
The main disadvantage is limited control: customer-submitted photos can outnumber or overshadow your own, and Google’s automatic cropping sometimes cuts a well-composed shot awkwardly on different devices.
How Long Does It Take Google to Process Business Photos?
Most uploads move from Pending to Live within a few hours to a couple of days; if a photo stays Pending much longer than that, Google’s processing guidance suggests deleting and re-uploading it.
Can I Remove Photos From My Google Business Profile?
Yes, for any photo listed under the “By owner” tab, you can delete it instantly from the Photos panel. Customer-submitted photos require flagging them as inappropriate rather than a direct delete.